Wednesday, October 31, 2012

Christmas Glitter House For Winter Village.

The holiday season has begun and so is my décor. I have never made a Christmas winter village before this year I have decided to make one.  My winter house is ready; the Christmas trees are ready too just can’t wait to set the whole Village. Here is one of my houses I made for my winter village.

It’s such an easy DIY project.
For this I needed:
Card stock paper
Glitter
Scissors
Glue
Hot Glue
And the template for the house -(you will find different kinds of template on the net)

I traced the template on the card stock paper and cut accordingly.


Once done with cutting I glued the house together. For the Window i used butter paper. I glued the butter paper for the window cut out from inside.


I applied glue for the portion I needed to  glitter and sprinkled the glitter on top of the glue.

Once glittered its ready. Here are some more winter houses i have made including the Church.


Cant wait to get my Winter Village ready.

Wednesday, October 17, 2012

DIY Spoon Sunburst Mirror.

I was inspired by Kristi when i checked her blog for this project. I had seen the beautiful sunburst mirror she made out of spoons it was just gorgeous. So thought why not try it out. And here’s the result. Mine is a smaller version;) You will find step by step instruction on her blog http://www.addicted2decorating.com.


Here its hanging in my kitchen

Monday, October 15, 2012

Wax Paper Chandelier

If you are in love with these beautiful capiz Chendelier but cant find it or afford it or need something cheaper than why not DIY?

I made this Chendelier out of Wax Paper and is it not similar to the Capiz Chendelier and cheaper too...;)
All i  needed  was  Wax paper, cardboard, nidle and tread.

Cut your wax paper into long pieces.Iron your pieces together.I had no parchment so i used just plain paper it worked..;) Start by laying down paper then three pieces of wax paper, then paper and iron them.

Once you are done ironing flod your paper in ziz zag.

You can use a circle cutter to cut the circle of your choice of size. I din't had a circle  cutter so i traced circle on the wax paper using pencil.

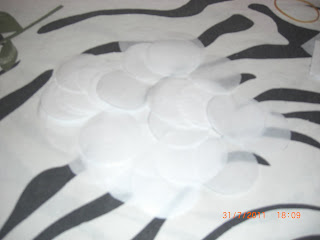
 After you are done tracing its time to cut the circles which took a lot time and the result as shown below.


For the frame you can use a hanging basket or an old lamp shade or anything that comes to your mind. I used cardboard...:)
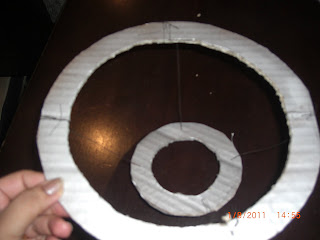
Drew two size circle on the cardboard a small and a big size. You will see 2 big size and 2 small size thats because i planned of making 2 chendelier for our bedroom...;) Later i cut the cardboard and spray painted it in silver.
Once it dried up it was now time for me to join them. I used tread to join the smaller circle to the larger one as show below.


once you are done with this its time to add your cut butter paper circle.
You can glue it or you can use your needle and thread to add the butter paper circle. And here is the result.
 

DIY Wedding Flowers.

Bridal Bouquet


Bridemaid Bouquet


Flower Gilr Headgear


My Friend has made her bridal bouquet, the bridesmaid bouquet and the flower girls head gear out of nylon flower she made herself. Are they not gorgeous? I just love them .She is planning to make the Bridesmaid head gear as well.

Saturday, October 13, 2012

DIY Wedding Decor

Hi I am back after a long break even though I was on a break my creativity was on my head and yes I am helping my dear friend with her wedding deco who is getting married this December. I am pleased to show you’ll my deco which I have made for her wedding.
Since her wedding is in the month of December we decided to choose the Christmas theme and the color she’s chosen are purple and white.


The Bride’s and Groom Chair Wreath.

 I made 2 of these which will be tied for their chairs.

Church Bench Wreath.

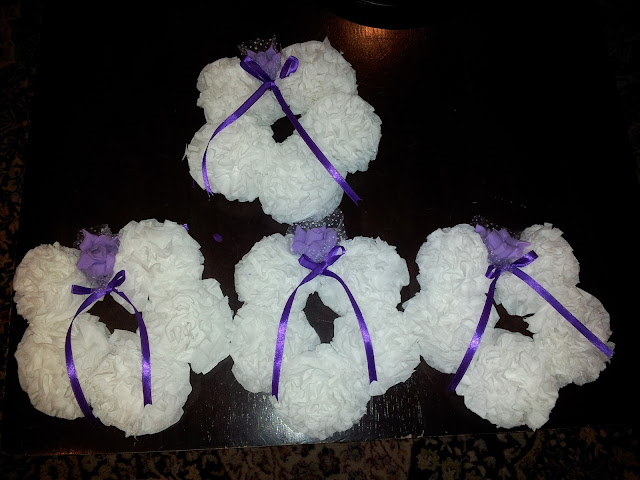
These wreaths are for the church benches.Made 30 of these.
Let me tell you these wreaths are made out of tissue paper. I have use tissue paper to create the carnation. I have not used Styrofoam rings but I decided to recycle old cardboard boxes which I had. I cut the boxes in circle and wrapped them with ribbons and glued the carnation on it. I bought a bunch of artificial purple roses and glued one rose on it along with a purple ribbon bow.

Ring Bearer Pillow.

I checked plenty of ring bearer pillows on the net and finally decided to go with the flower ring bearer pillow. This pillow is made out of satin material. Just had to take a little trouble with the flower but the template made it easy for me.  I used the template to make the flower Patel and once it was cut I slightly burned the edges with the help of a candle so it gets a kind of a curvy look. I used two of each flower Patel so total petals I used were six. Glued them together and glued a shiny stone on top of it along with the ribbon.

Here is the template for the flower which i got from the net. 


Flower Girl Pomander Ball


To make this pomander ball I used Styrofoam ball and ribbons. I wrapped the ball with white ribbon. I used small size ribbon to make the purple roses and glued them according on the ball. To get a more shinny look I used swarovski stone which I had. I glued them on top of the roses and on the reaming part of the ball. Made bows of the ribbon and glued them on top and bottom of the ball. Used a ribbon to make the loop and glued it.


Sunday, March 4, 2012

Artificial Orchid Arrangement

I had been to Center Point and seen these lovely breath taking artificial orchids but the cost was breath taking too. One piece coasted 20$ so i thought why not include this in my DIY project which can cost much less.


So here is my artificial orchid vase DIY project.

Materials used is proclain plate, artificial orchids, artificial moss ball, artificial leaves and hot glue total cost about 2$


First i glued the orchid to the artificial moss and later glued it to the plate.


Later i arranged the orchid in the desired position i required and glued the leaves and added some stones to it so it could have a natural look.
And here's its final look  pretty pretty just in  2$.

I made more 2 of these of same kind to have it on my side tables in my leaving room.


Monday, February 27, 2012

Wood Stick and Tissue Paper Flowers

Don't they look pretty? Well these are made of wood sticks and tissue paper.

I had these wood sticks which i had bought for decorating purpose but they looked plain in a vase so i thought of giving it a new look. I cut out the tissue paper in small round circles and poked them in between for the wood sticks and glued them one by one leaving a gap in between.


And here's the new look.

Wednesday, February 22, 2012

My First Award by A 37'S 42. Thanks Mandy.

Terrarium


Made these terrarium  out of artificial plants but i love how they look.